Configuring SAML Authentication with Workspace One for Avi Controller
Overview
The Avi Controller offers multiple options for integrating the management console into enterprise environments for authentication management. Security Assertion Markup Language (SAML) is one of the options available. SAML enables integration into VMware Workspace ONE and take advantage of the App Catalog, network access restrictions and step-up authentication when administrators sign in.
Prerequisites
Before initiating the configuration, ensure the following prerequisites are done:
-
A DNS record is in place for the Avi Controller. This will be used for the fully qualified domain name (FQDN) that is used when signing into the system.
-
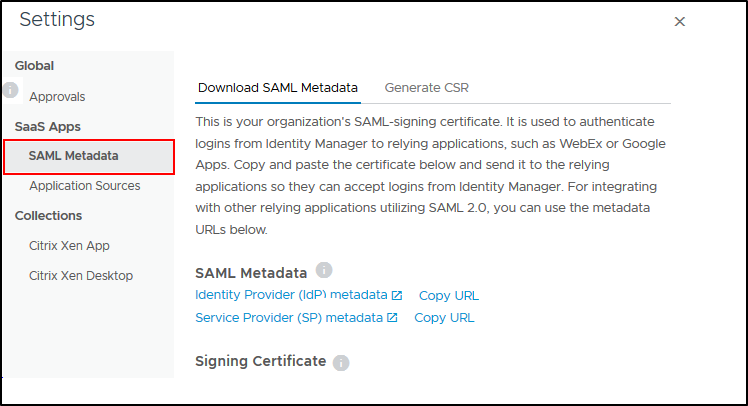
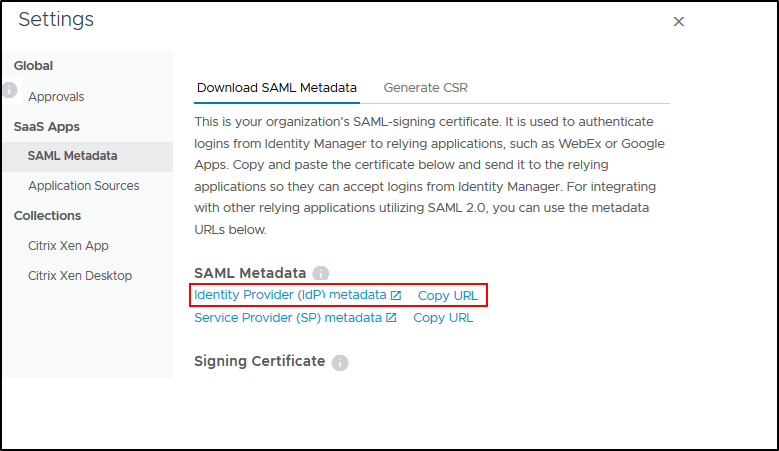
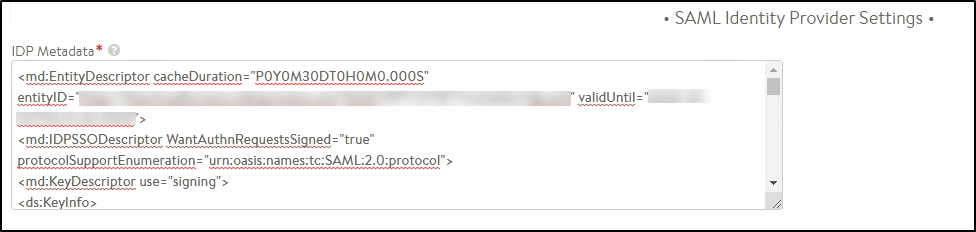
Get the Workspace One Access IDP metadata. Follow the steps below to download the file
idp.xmlfile.
SAML Configuration in Avi
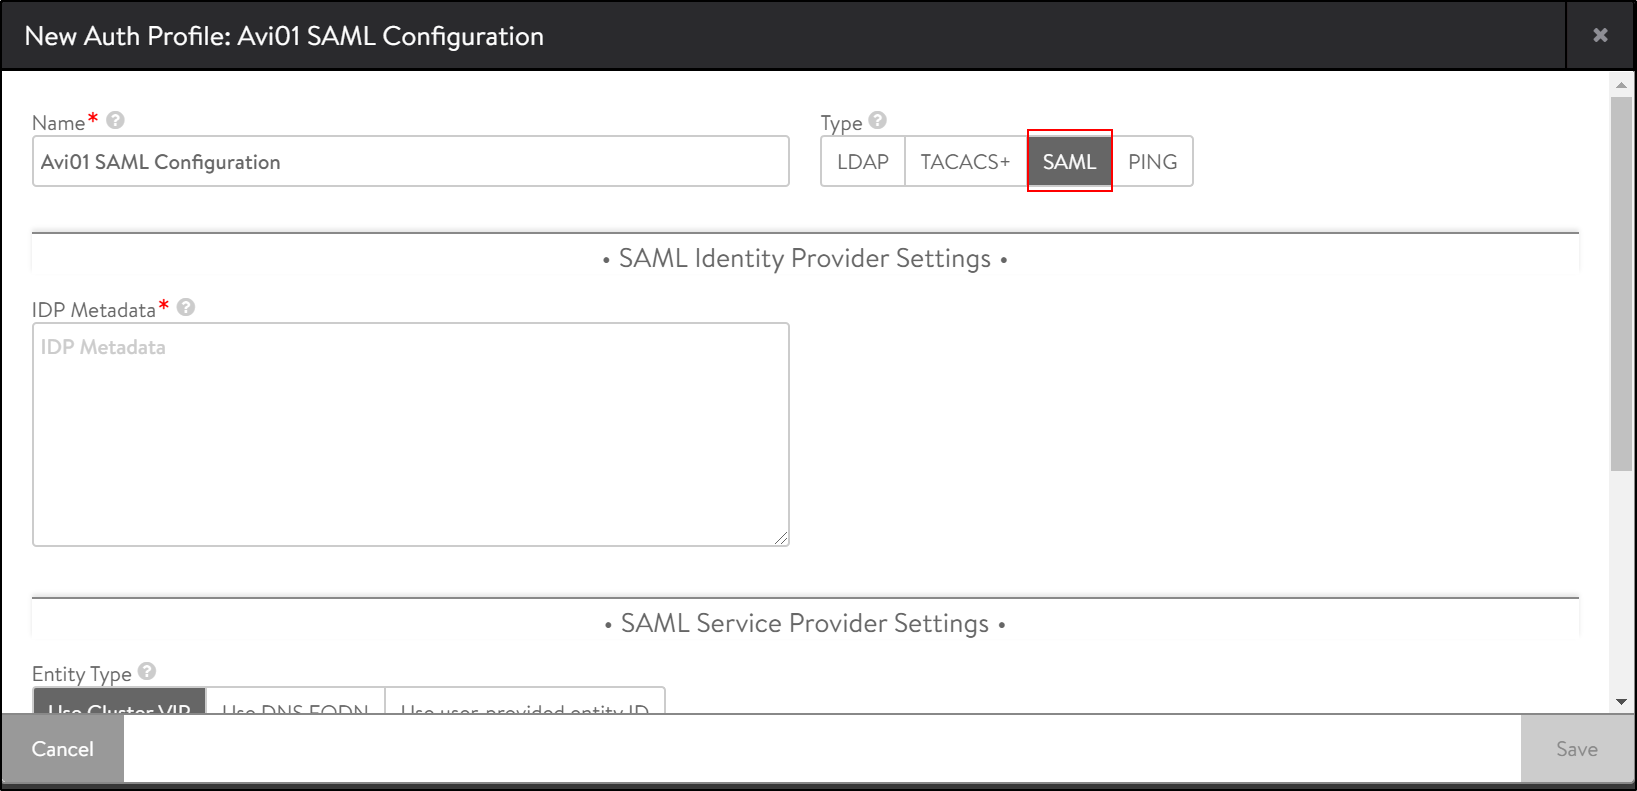
To configure an authentication profile to support SAML on the Avi Controller,
-
Log in to the Avi Controller with admin credentials.
-
Navigate to Templates > Security > Auth Profile.
-
Enter the Name of the auth profile.
-
Select SAML as the Type of auth profile.
-
Copy the contents of the idp.xml file and paste in the IDP Metadata field.
-
Select Use DNS FQDN as the Entity Type.
-
Enter the service provider organization details, as required.
-
Enter the FQDN to be used for the SAML configuration.
-
Click on Save.
Collecting Service Provider Metadata
Avi Vantage does not generate an xml file that can be imported into Workspace ONE Access. So, the metadata must be entered manually.
The following details must be collected:
-
Entity ID
-
SSO URL
-
Signing Certificate
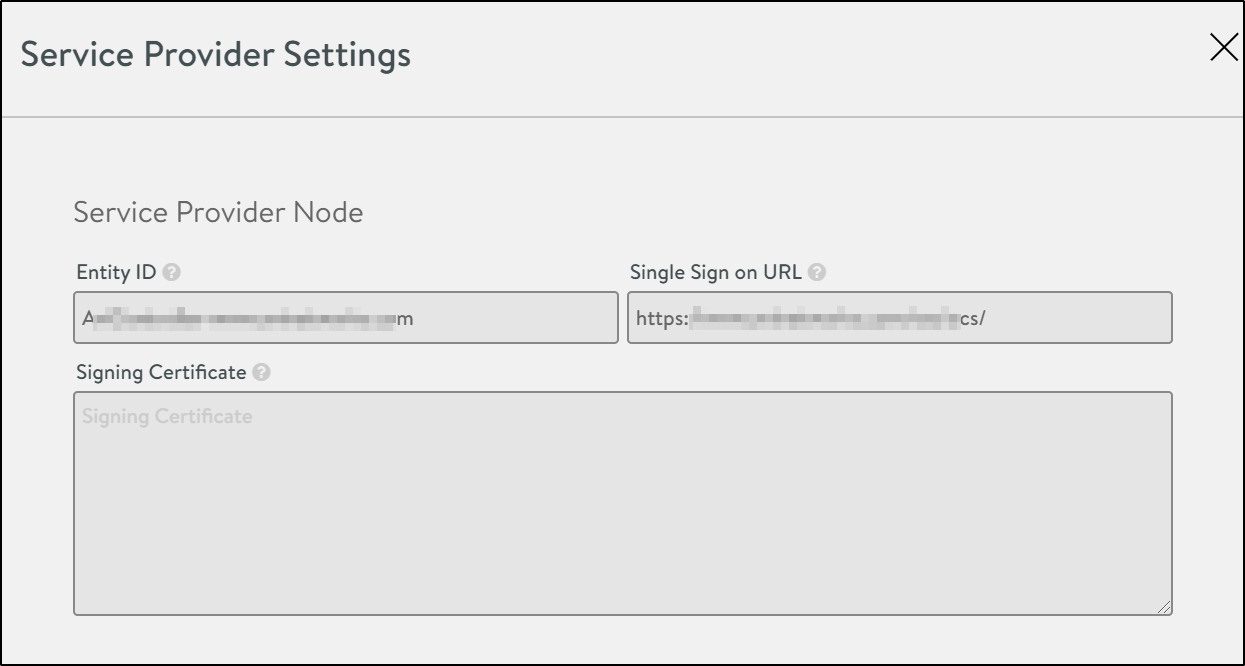
The entity ID and the SSO URL can be obtained from the Service Provider Settings screen.
To get the service provider settings,
-
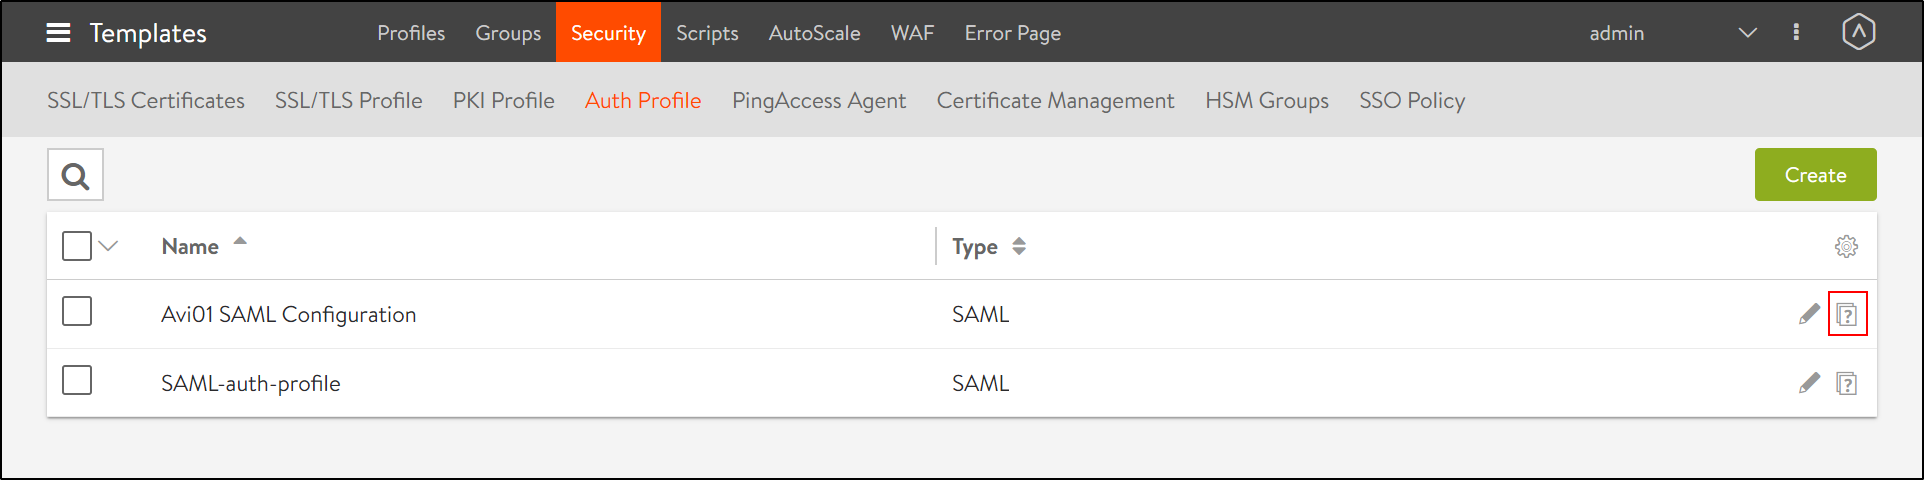
In the Avi Vantage UI, navigate to Templates > Security > Auth Profile.
-
Identify the authentication profile created and click on the verify icon as shown below:
-
From the Service Provider Settings screen, copy the Entity ID and the SSO URL and paste them in a text editor.
-
Close the Service Provider Settings screen.
To get the signing certificate,
-
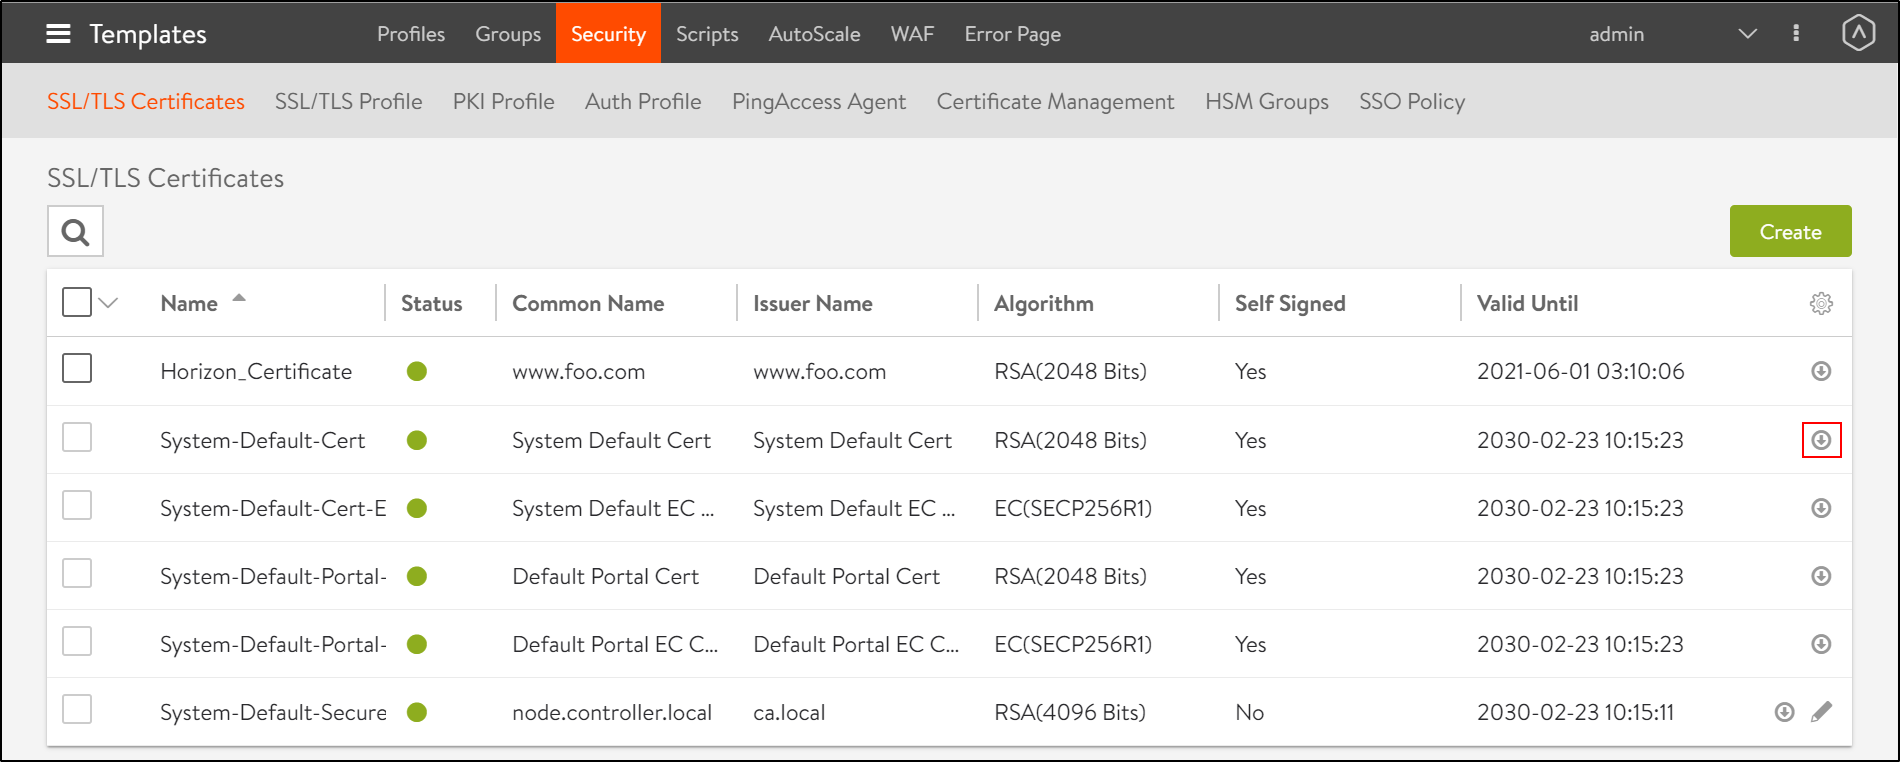
From the Avi UI, navigate to Templates > Security > SSL/ TLS Certificates.
-
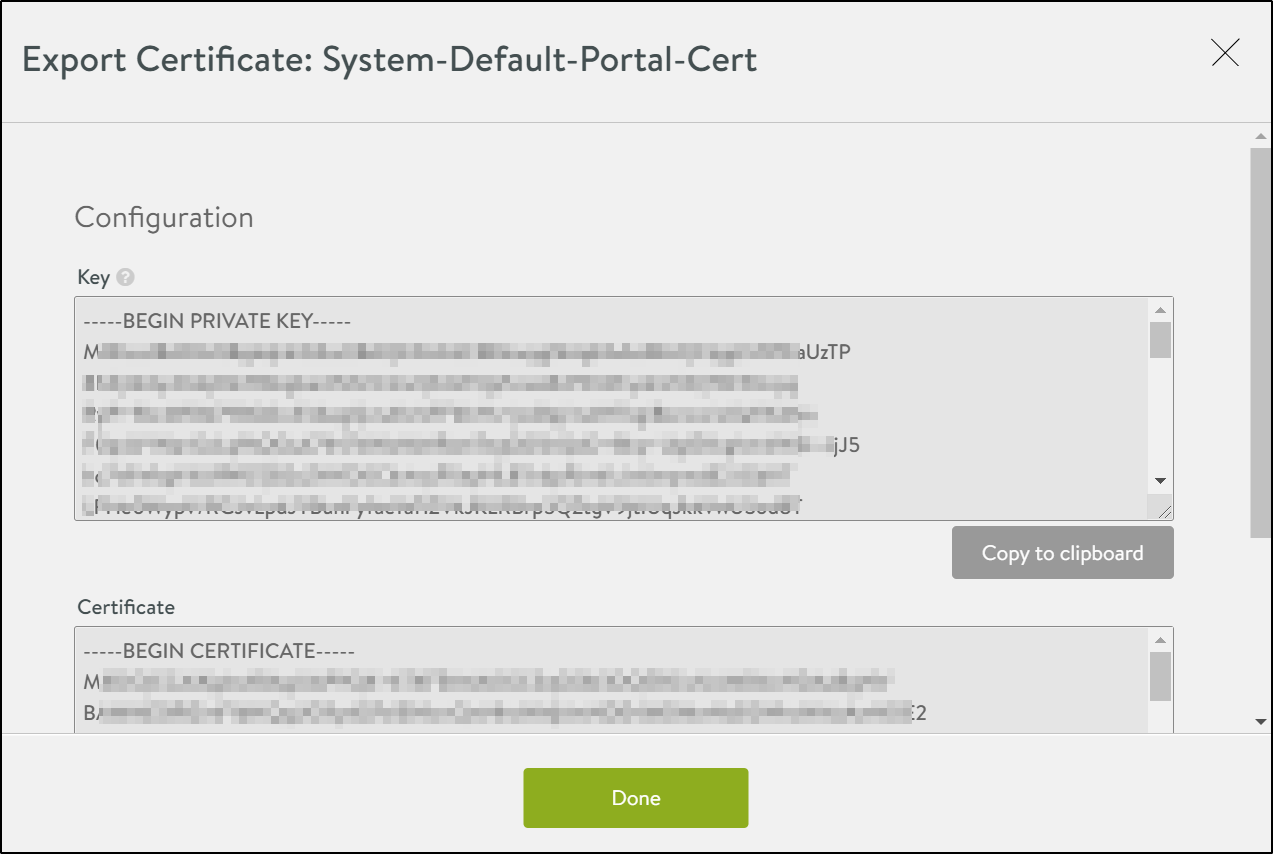
Find the System-Default-Portal-Cert and click on the Export icon as shown below:
-
From the Export Certificate screen, click on Copy to clipboard below the Certificate to copy the details.
-
Paste the details into a text editor.
-
Click on Done.
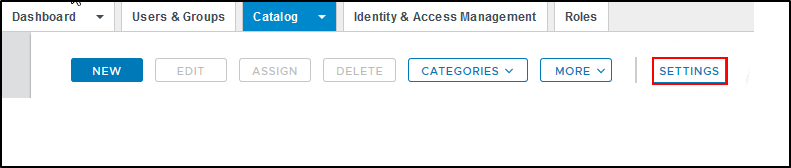
Configuring the Avi Catalog Item in Workspace One Access
Now that the SAML profile is created in the Avi Controller, now, the Workspace ONE catalog entry must be created.
To create the Workspace ONE catalog entry,
-
Log in to your Workspace ONE Access administrator console.
-
Navigate to the Catalog tab.
-
Click on New.

-
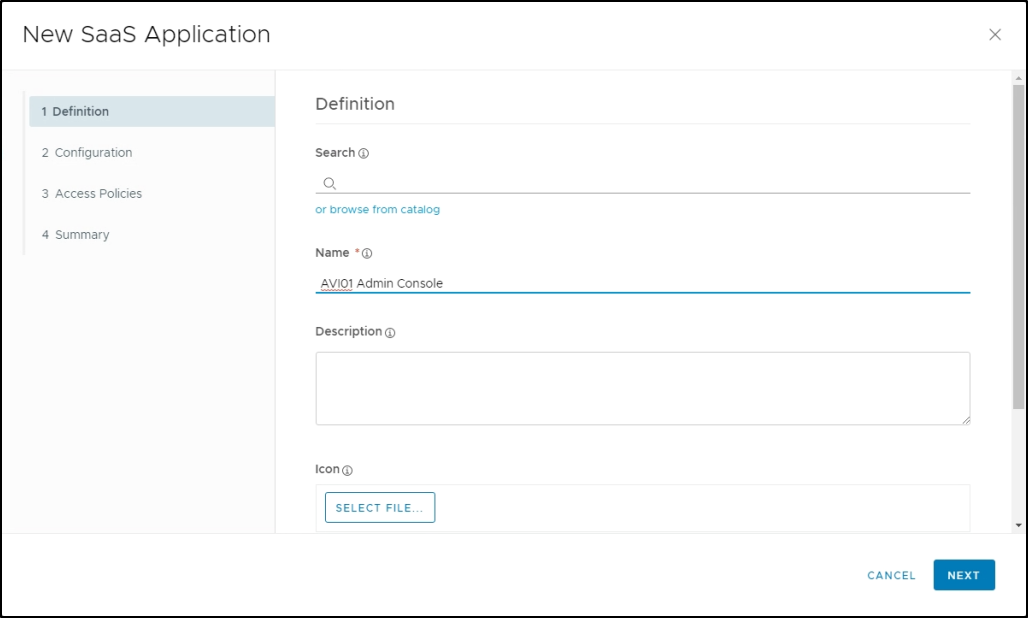
In the New SAAS Application screen, enter a Name for the new Avi entry in the App Catalog.
-
If you have an icon to use, click on Select File and upload the icon for the application.
-
Click on Next.
-
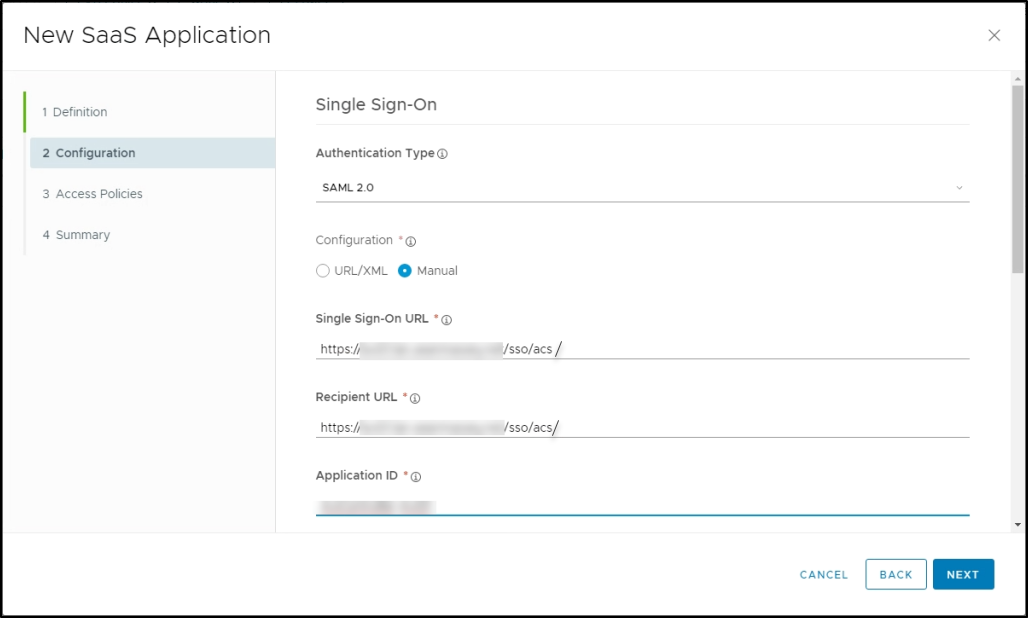
Enter the following details:
- Authentication Type: SAML 2.0
- Configuration Type: Manual
- Single Sign-on URL: Use the single sign-on URL copied from the Service Provider Settings screen in Avi.
Note: The trailing slash (/) after acs is mandatory. - Recipient URL: Same as the Single Sign-On URL
- Application ID: Use the Entity ID copied from the Service Provider Settings screen in Avi.
The New SAAS Application screen is as shown below:
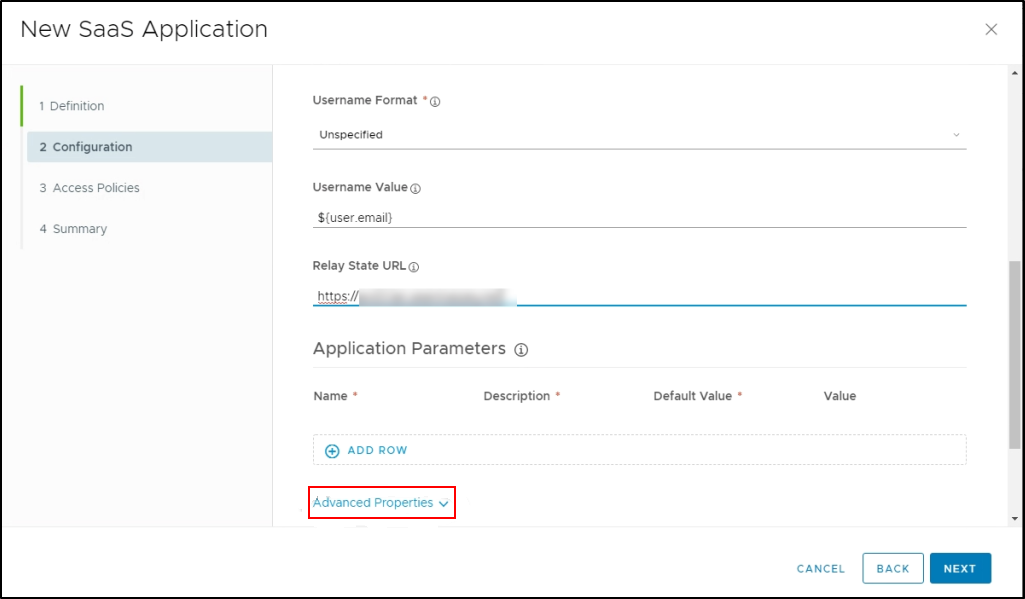
- Username Format: Unspecified
- Username Value: ${user.email}
- Relay State URL: The FQDN or IP address of your appliance
-
Click on Advanced Properties to expand it.
-
Enable the properties as shown below:
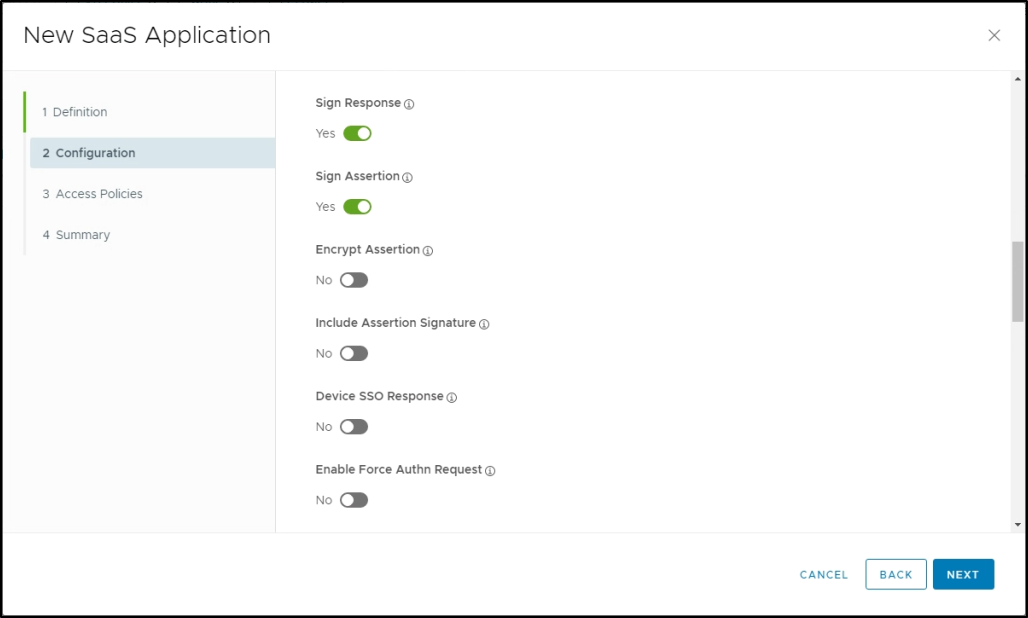
Note: Starting with Avi Vantage version 20.1.1, both SAML assertion and response signing are mandatory for successful SAML authentication.
-
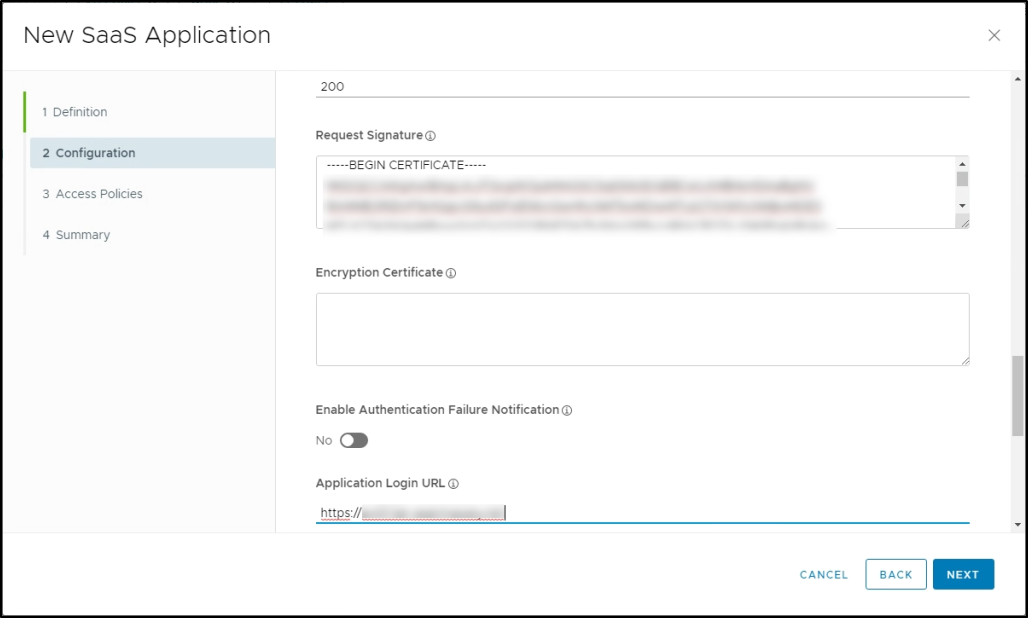
Copy the value of the System-Default-Portal-Cert certificate and paste it into the Request Signature field.
-
Enter the FQDN or IP address of the appliance as the Application Login URL. This enables SP-initiated login workflows.
-
Click on Next.
-
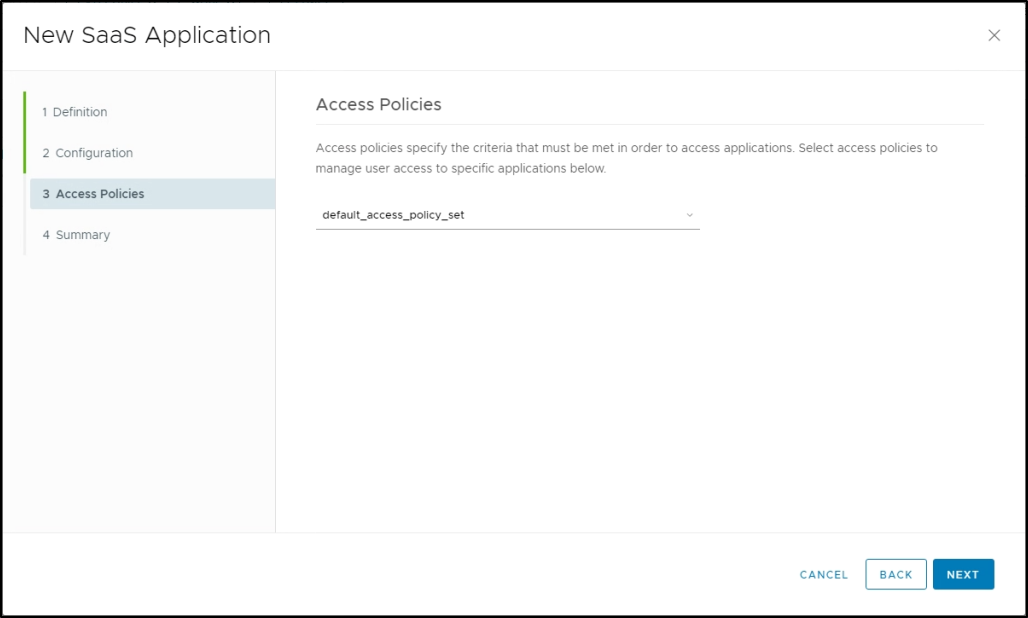
Select the Access Policies to use for this application. This determines the rules used for authentication and access to the application.
-
Click on Next.
-
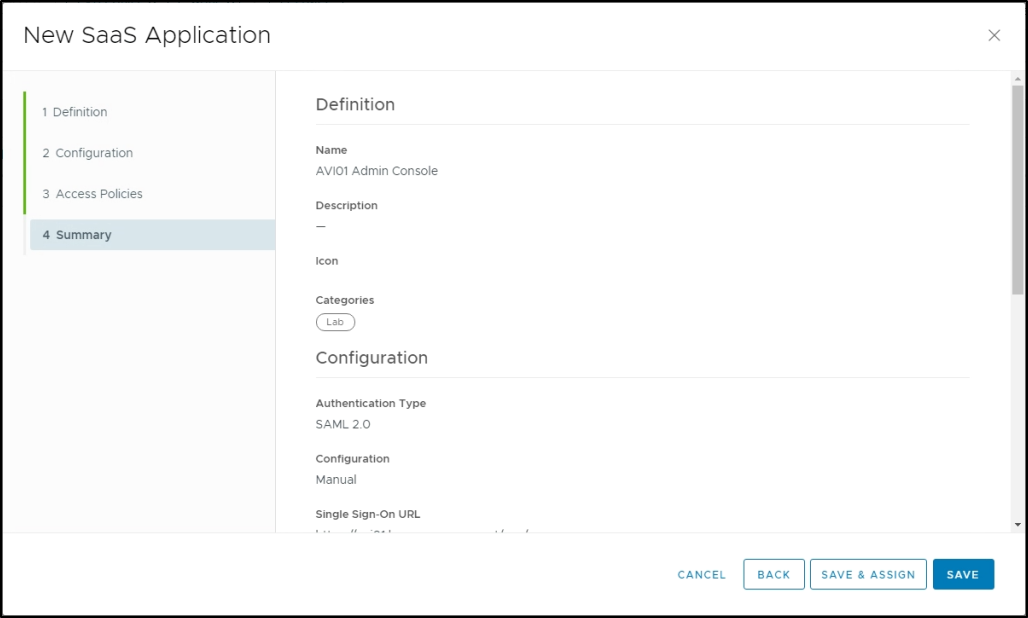
Review the summary of the configuration.
-
Click on Save & Assign.
-
Select the users or groups that will have access to this application and the deployment type.
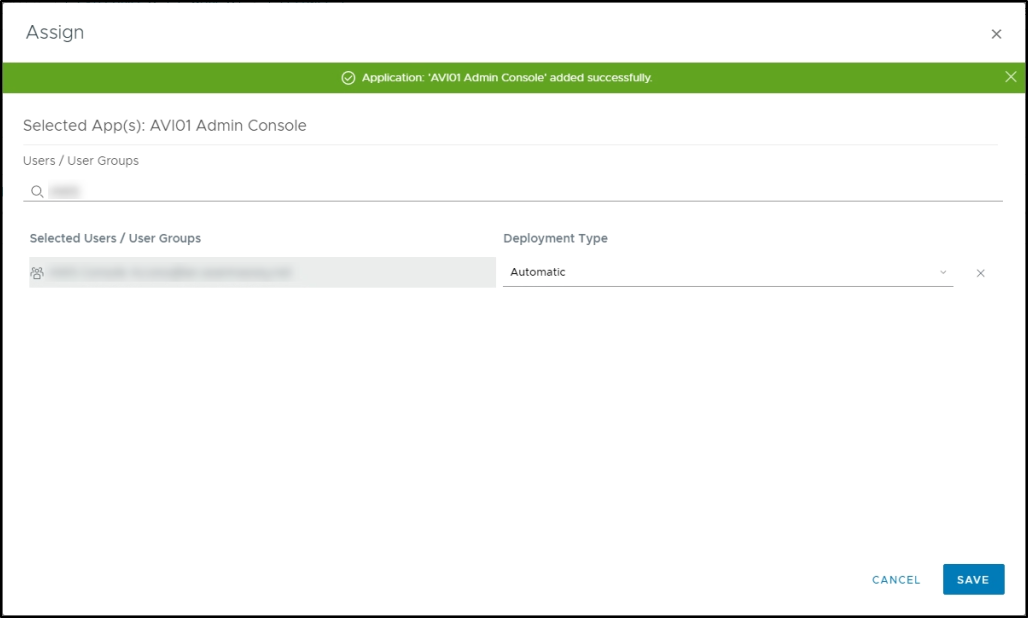
-
Click on Save.
Enabling SAML Authentication in Avi
After creating SAML profile in Avi, and a SAML catalog item in Workspace One Access, we can enable SAML and grant superuser rights to SAML users.
Note: It is possible to configure more granular role-based access control by adding application parameters into the Workspace One Access catalog item and then mapping those parameters to different roles in Avi Vantage. For more information, refer to Authorization: Tenant and Role Mapping Examples
To enable SAML and map user roles,
-
Log in to the Avi Controller with admin credentials.
-
Navigate to Administration > Settings > Authentication/Authorization.

-
Under Authentication, select Remote.
-
Under Auth Profile, select the SAML profile that was created earlier.
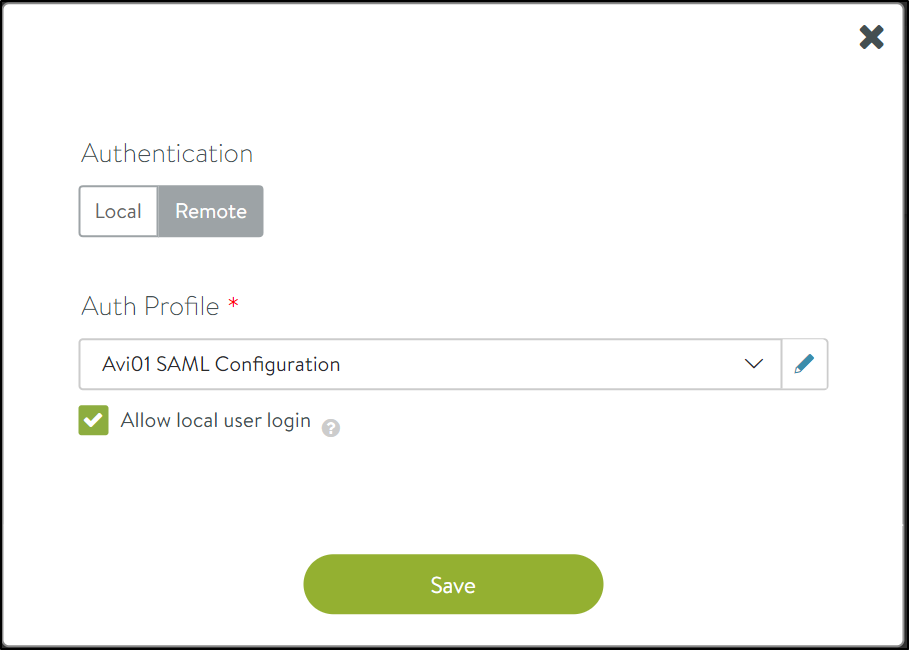
-
Ensure that the Allow Local User Login option is checked. If this option is not selected, and there is a configuration issue, you will not be able to log back into the Controller.
-
Click on Save.
-
On saving the authorization details, the New Mapping option appears as shown below:

-
Click on New Mapping and in the New Tenant and Role Mapping screen enter the details as shown below:

-
Click on Save.
SAML authentication is now configured on the Avi Controller.