How to Create a Common DNS Virtual Service for TCP and UDP Requests
Background
A common DNS virtual service for TCP and UDP requests can be configured by using Edit Virtual Service option on Avi user interface. This virtual service responds to both type of requests — TCP and UDP.
Instructions
Follow the steps mentioned below to configure a common DNS virtual service that will respond to TCP and UDP requests:
-
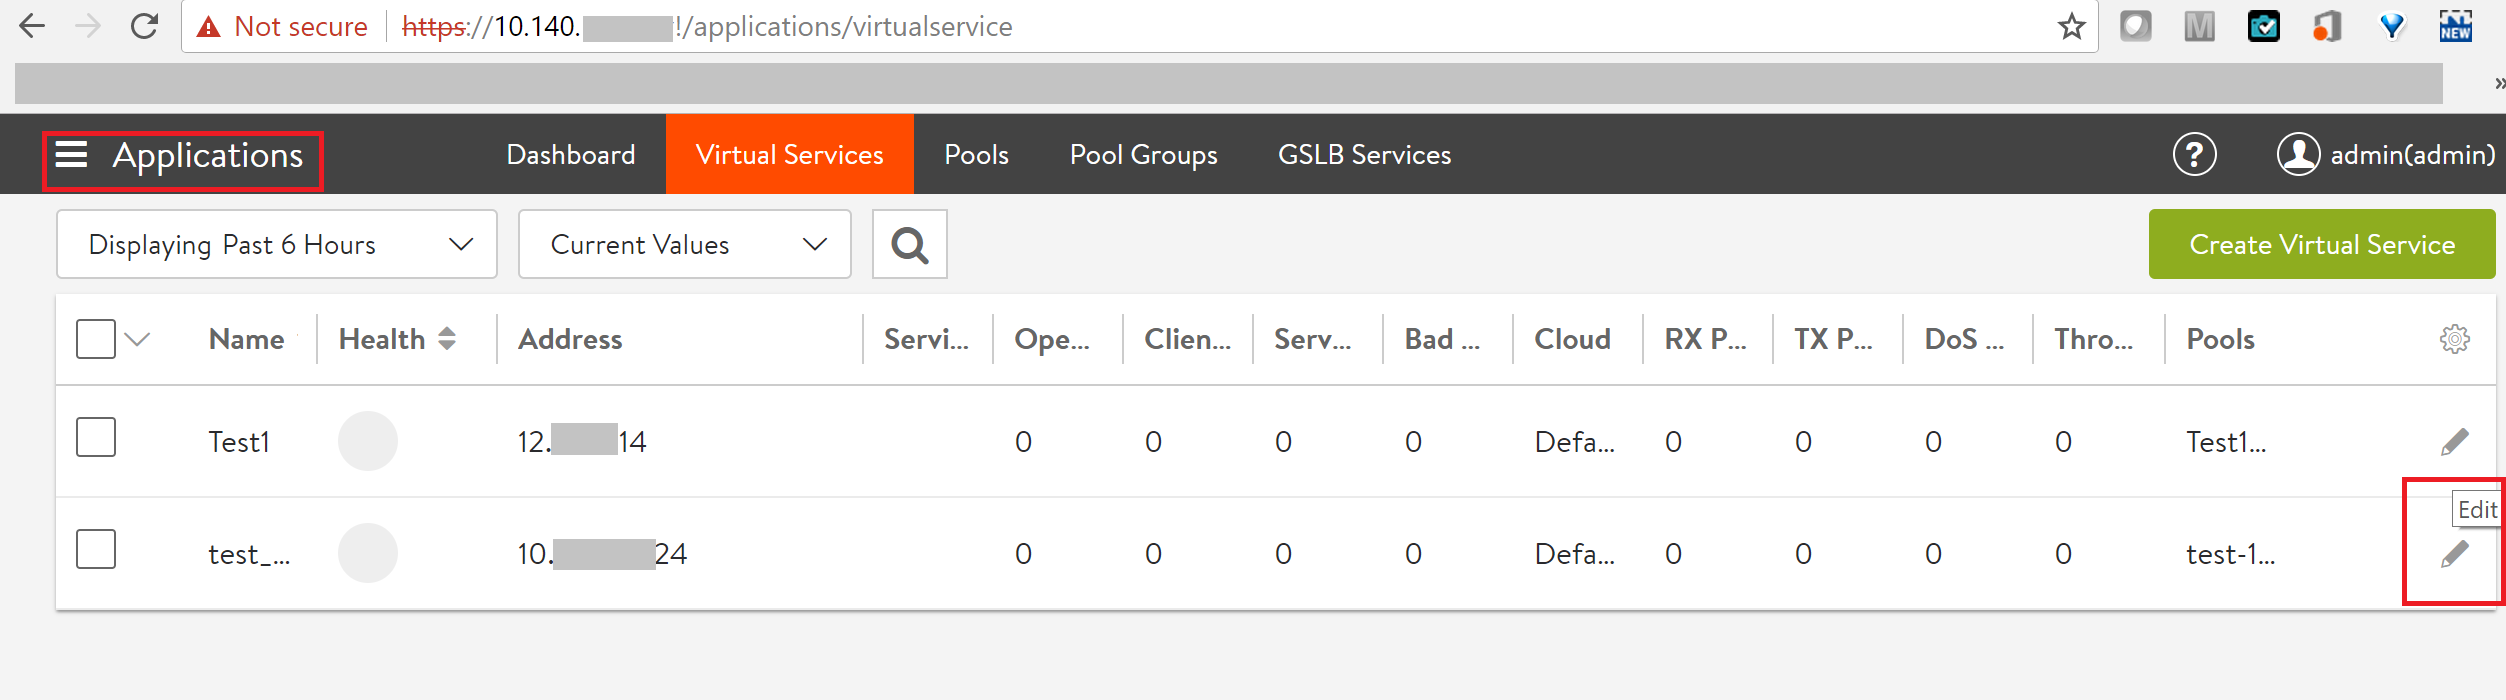
Login to Avi user interface. Navigate to Applications > Virtual Services, choose the desired virtual service. Click on the edit icon (the pencil icon) at the right side. To create a new virtual service, refer to Create a Virtual Service.
-
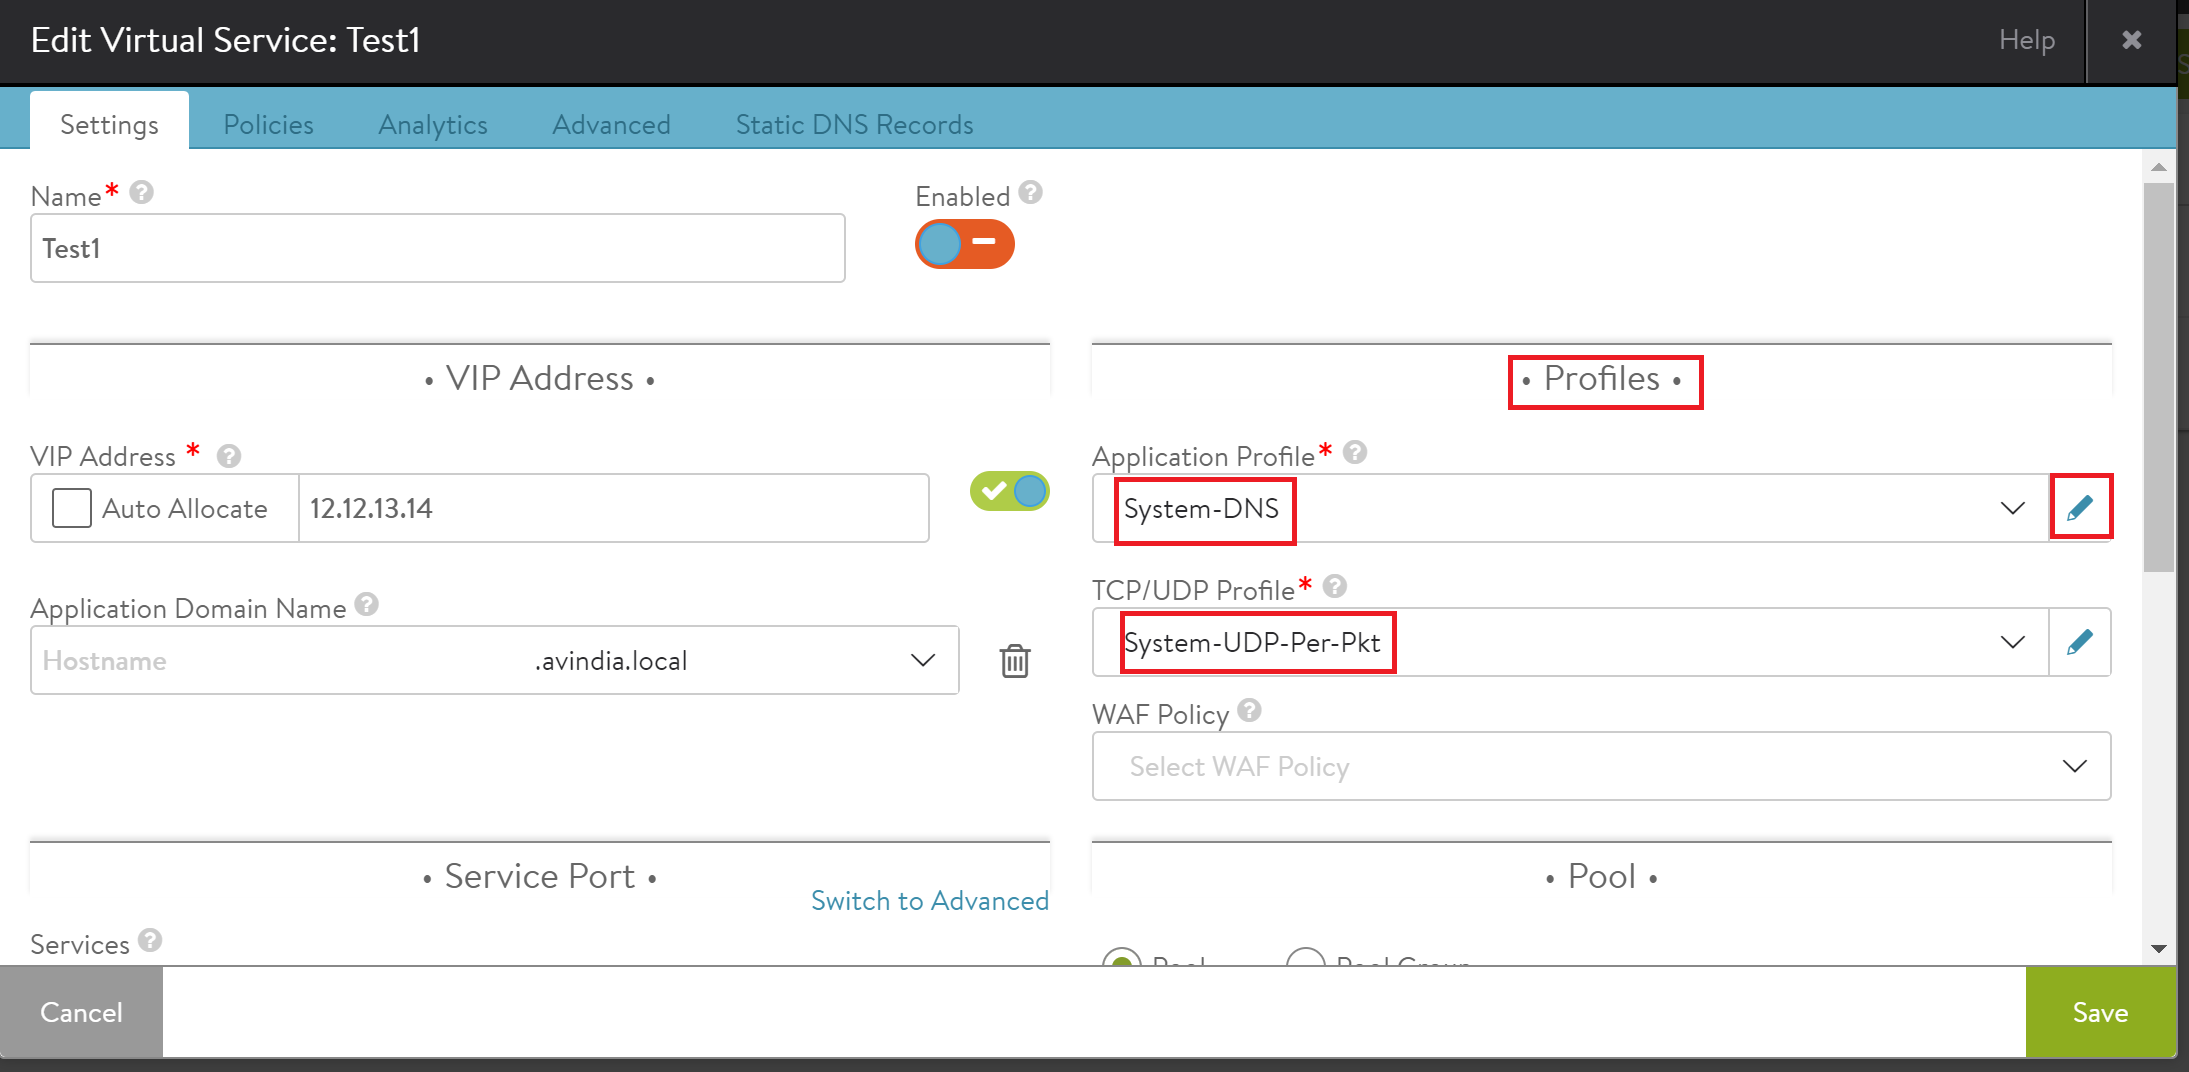
Select Settings option on the Edit Virtual Service page. Choose System-DNS from the drop-down menu of Application Profile in the Profiles section. For TCP/UDP Profile, select System-UDP-Per-Pkt from the drop-down menu.
-
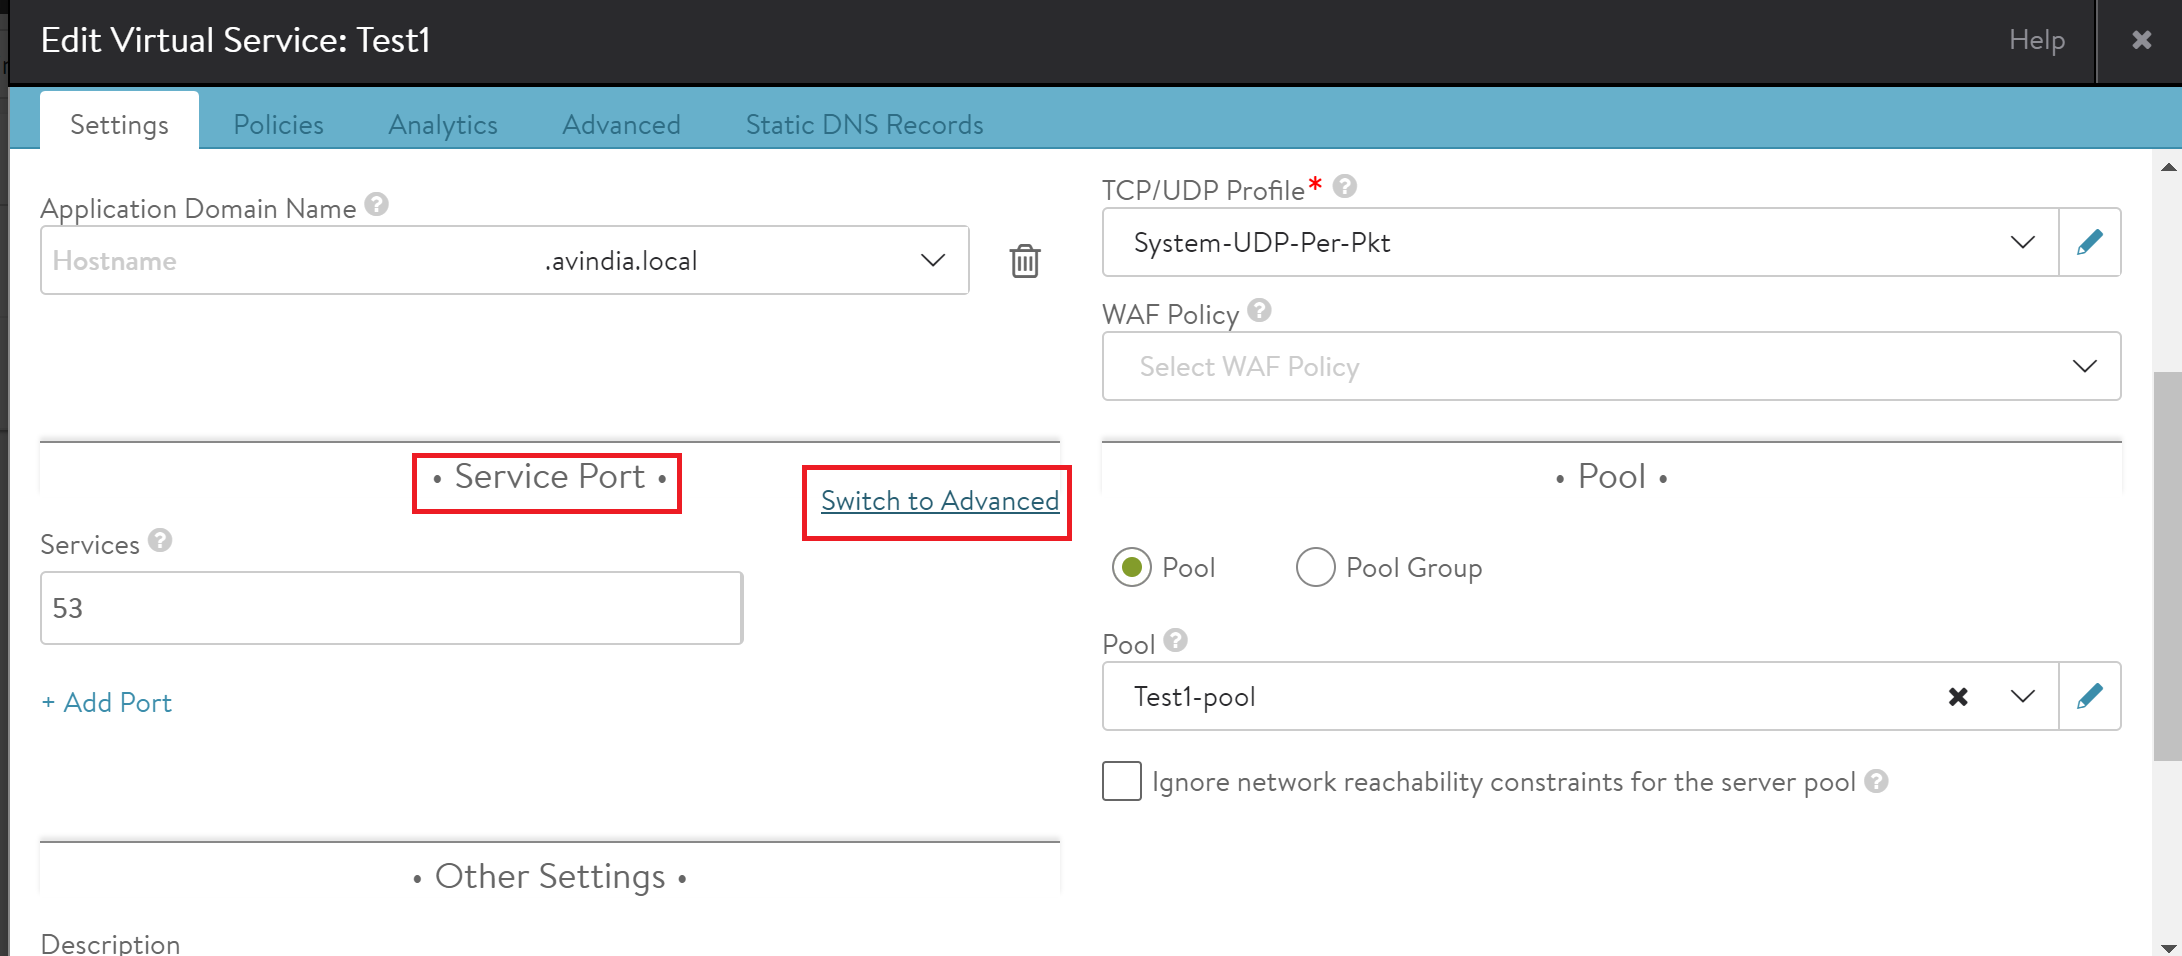
Navigate to Service Port section under the Edit Virtual Service tab. Select Switch to Advanced option as shown below.
-
Set the value for Port Min as 53 and Port Max as 53. Select Override TCP/UDP option under Service Port and select System-TCP-Proxy as shown below. Click on Save.

Checking logs using Avi UI
To confirm DNS requests changes, logs for the DNS virtual service can be checked using Avi user interface. Follow the below-mentioned steps to access the logs for the virtual service:
Navigate to Applications > Virtual Services, click on the virtual service name and select Logs option.

From the above screenshot, it is observed that the same virtual service 4.5.6.7 responds to TCP and UDP requests coming from the client IP address 10.10.30.55 for DNS request type.