IPAM Provider (Google Cloud Platform)
Overview
Avi Vantage integrates with Google Cloud Platform (GCP) for providing Internet Protocol Address Management (IPAM) services to applications running on instances in GCP. This article explains how to create a GCP profile and configure GCP IPAM.
Note: Starting with Avi Vantage version 20.1.3, Linux Server Cloud and GCP IPAM on GCP are not supported.
Prerequisites for GCP IPAM
-
Set up the Avi Controller and Service Engine instances on GCP. To know more, refer to Example Configuration of Avi Controller and SE Instances on GCP.
-
Install Avi Vantage in a Linux Cloud. To use GCP as the IPAM provider, all the Avi Controller and Service Engine instances must run in Google Cloud. The cloud type selected within Avi should be Linux Server Cloud. To know how to set up a Linux Server Cloud, refer to Installing Avi Vantage for a Linux Server Cloud.
-
GCP uses a /32-based interface IP configuration. To support this, perform the following after configuring the Linux Server Cloud.
In the CLI,
configure serviceengineproperties
se_runtime_properties
se_handle_interface_routes

service_ip_subnets subnet/mask
save
save
Reload all the Service Engines for the configuration to take effect.
The service_ip_subnets configuration optimizes the Docker routes on the Service Engines. If VIP allocation is done from multiple subnets, specify all of them.
Configuration of GCP IPAM
Create the GCP IPAM in Avi Vantage, and configure it by following the steps given below.
Creating the IPAM Profile
- Navigate to Templates > Profiles > IPAM/DNS profiles.
- Click on Create.
- Enter the IPAM Profile Name.
- Select Google Cloud Platform IPAM as the Type as shown below.
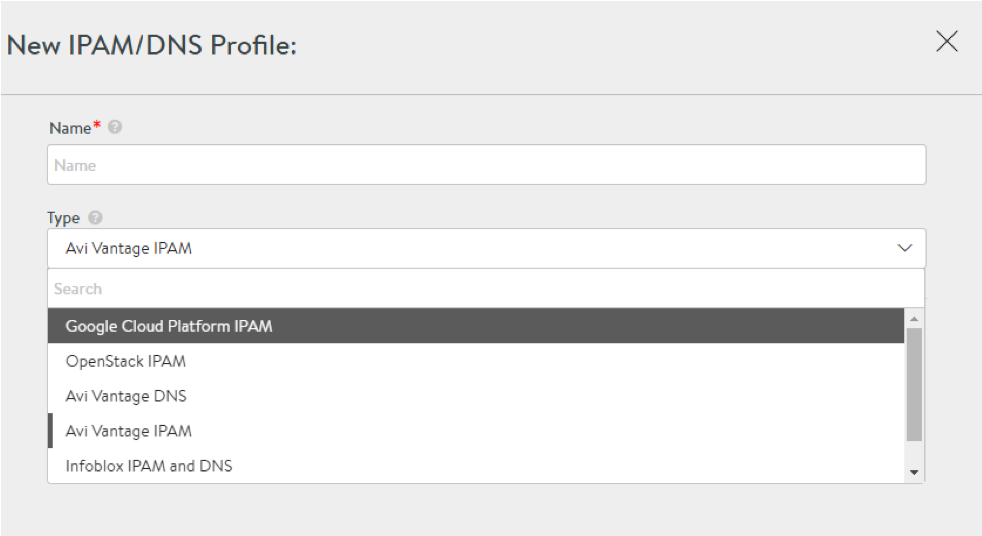
- Click on Save.
Starting with NSX Advanced Load Balancer 21.1.3, the following UI is available:
Option 1: Create a GCP cloud and select that cloud during creation of IPAM
Note: As a prerequisite to creating a GCP IPAM, create a cloud named GCP Cloud, with the following inputs:
- Service Engine Project ID - Project A (Project Name of the SEs)
- Service Engine Region - Region A (Region Name of the SEs)
- Zones
- VPC Project ID
- VPC Network Name
- VPC Subnet Name
- Cloud Storage Project ID
- Cloud Storage Bucket Name
-
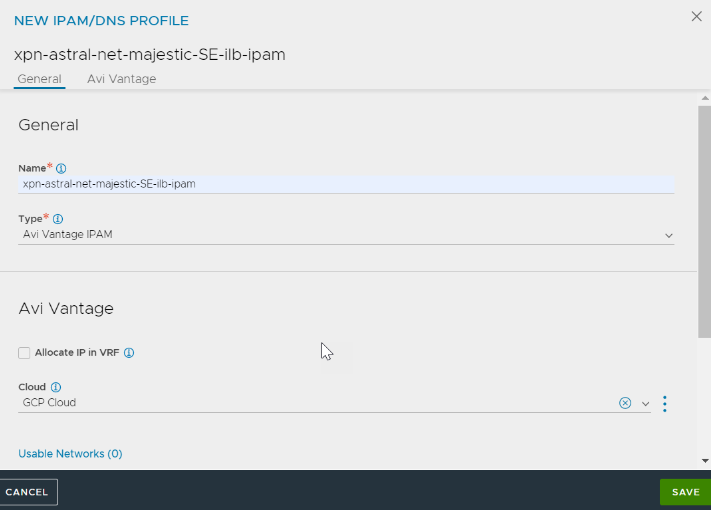
In the NEW IPAM/DNS PROFILE screen, specify the profile name.
-
Select Avi Vantage IPAM option from Type drop-down list and select the previously created cloud – GCP Cloud – for the Cloud field.
-
Add Usable Networks and click SAVE.
Option 2: You can also create an IPAM while creating or editing a cloud
-
Create a new GCP cloud or edit an existing cloud.
-
Navigate to IPAM/DNS tab. In the IPAM Profile field, click on the vertical ellipsis and then click Create.
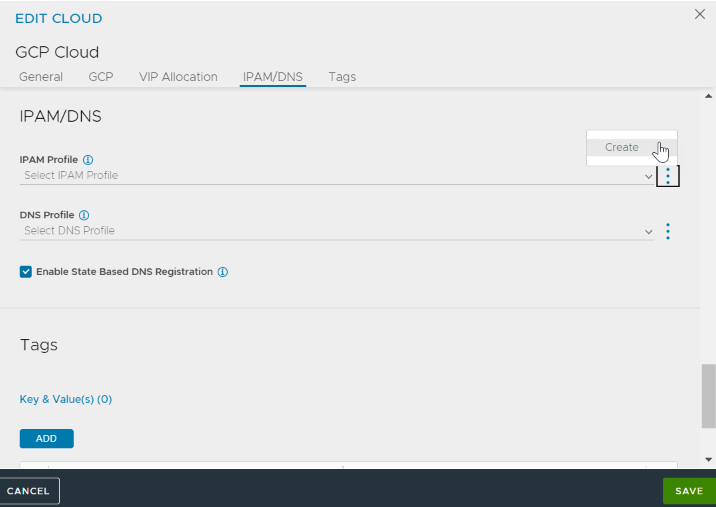
-
Configure the NEW IPAM/DNS PROFILE as shown in Option 1.
-
Complete the Cloud configuration by clicking SAVE in the EDIT CLOUD screen.
Configuring GCP IPAM
- Navigate to Infrastructure > Cloud.
- Select Default Cloud and click on the Edit icon.
- The IPAM that was created appears in the IPAM Profile dropdown list. Select the IPAM Profile.
- Configure a Linux Server Cloud using the IP addresses for the Avi Service Engine instances created.
GCP IPAM has been configured, and virtual services can now be provisioned.
Notes
- On GCP only L3 scale out mode is supported for virtual services.
- Some GCP zones may require the MTU to be lowered to 1400. To set the MTU on the Service Engines,
configure serviceengineproperties
se_runtime_properties
global_mtu 1400
save
save
The MTU value will take effect after the Service Engines are rebooted once.
Assigning Floating IP
Starting with Avi Vantage release 18.1.2, support for Floating IP (where a load balancer whose frontend will be a public IP allocated from GCP and the backend will be the Service Engines) is provided. Floating IP can be assigned via the CLI as shown below.
++Truncated Output++
+------------------------------------+-----------------------------------------------------+
[admin:10-146-43-2]: virtualservice> vip index 1
[admin:10-146-43-2]: virtualservice:vip> auto_allocate_floating_ip
Overwriting the previously entered value for auto_allocate_floating_ip
[admin:10-146-43-2]: virtualservice:vip> save
[admin:10-146-43-2]: virtualservice> save
++ Truncated Output++

Note: Assigning floating IP is currently supported via the CLI only. UI support will be scoped-in in the future releases.
Auto-allocate Floating IP
All GCP resources will be created in the SEs project. Only auto-allocation of floating IP is supported.
++Truncated Output++
[2018-07-16 06:48:08,717] INFO [gcp_nlb.allocate_vip:63] old_vip_info: vip {
addr: "55.55.55.100"
type: V4
}
alloc_fip: false
|| new_vip_info: vip {
addr: "55.55.55.100"
type: V4
}
alloc_fip: true
Swagger APIs can be used to auto-allocate a Floating IP via a PUT request using the same as below.
"vip" : [ {
"availability_zone" : "aeiou",
"ip6_address" : "",
"subnet" : "",
"port_uuid" : "aeiou",
"subnet_uuid" : "aeiou",
"avi_allocated_vip" : true,
"vip_id" : "aeiou",
"ip_address" : "",
"auto_allocate_floating_ip" : true, *
"enabled" : true,
"floating_subnet6_uuid" : "aeiou",
"auto_allocate_ip" : true,
"subnet6" : "",
"floating_ip" : "",
"floating_subnet_uuid" : "aeiou",
"avi_allocated_fip" : true,
"subnet6_uuid" : "aeiou",
"floating_ip6" : "",
"ipam_network_subnet" : "",
"network_ref" : "aeiou",
"discovered_networks" : [ "" ]
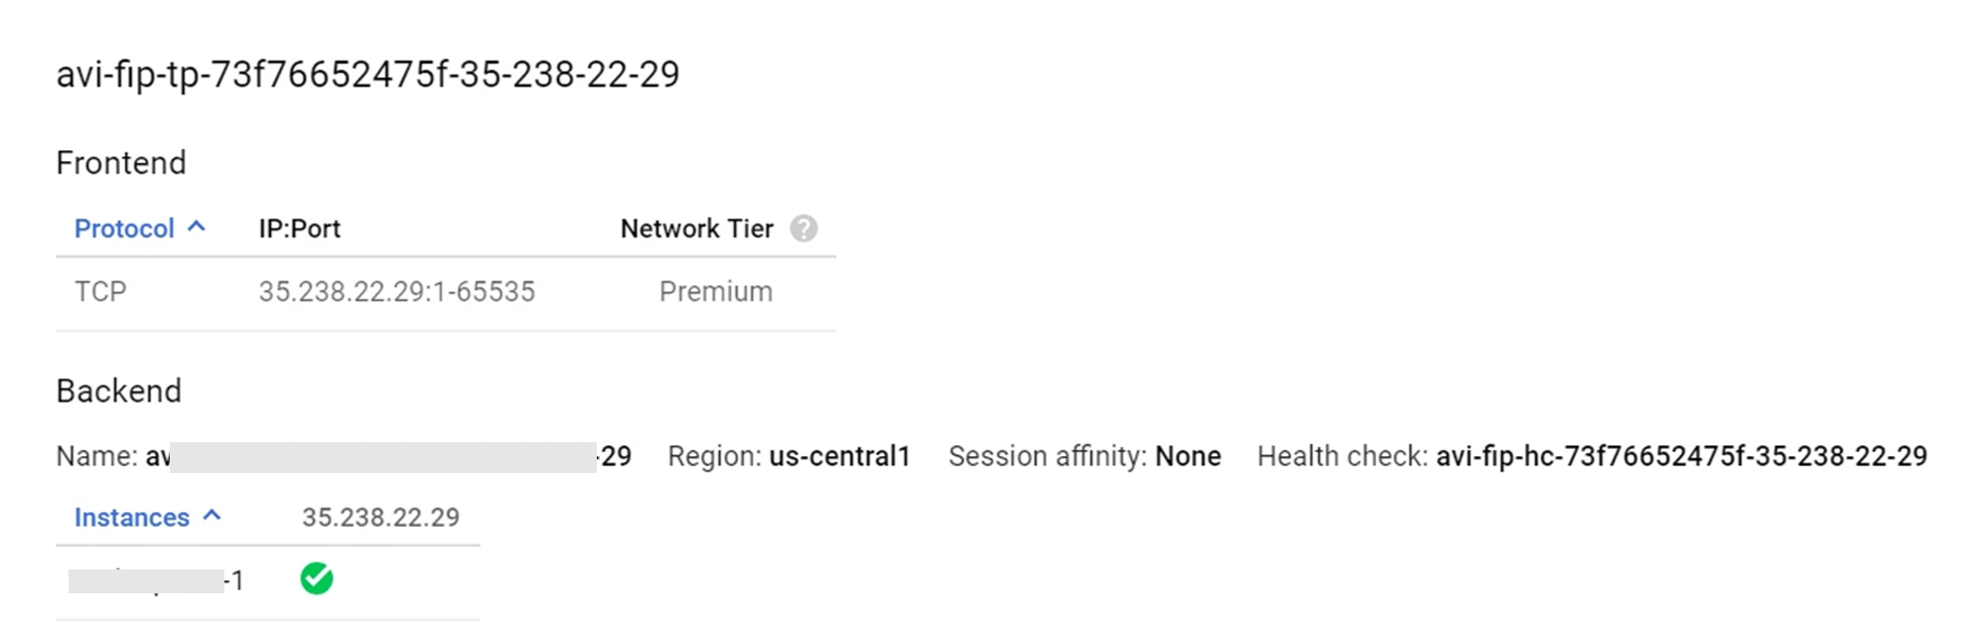
Shared-VIP
Shared VIPs can be created on the same IP as shown in the image.

Configure GCP IPAM for Kubernetes/OpenShift
Starting with Avi Vantage release 20.1.1, the Avi Kubernetes/OpenShift cloud is not supported. Refer to the OpenShift and Kubernetes Cloud - End of Support article for more information.