User Profile
Overview
The User Profiles section on NSX Advanced Load Balancer is used to control a user access to NSX Advanced Load Balancer. You can configure and control different attributes related to the user account. By default, there are two user profiles available.
- Default-User-Account-Profile
- No-Lockout-User-Account-Profile
This article describes the creation of a user profile in NSX Advanced Load Balancer.
Managing User Profiles
The User Profiles screen lists down all the user accounts created.
To view User Profiles,
- Navigate to Administration > Accounts > User Profiles.
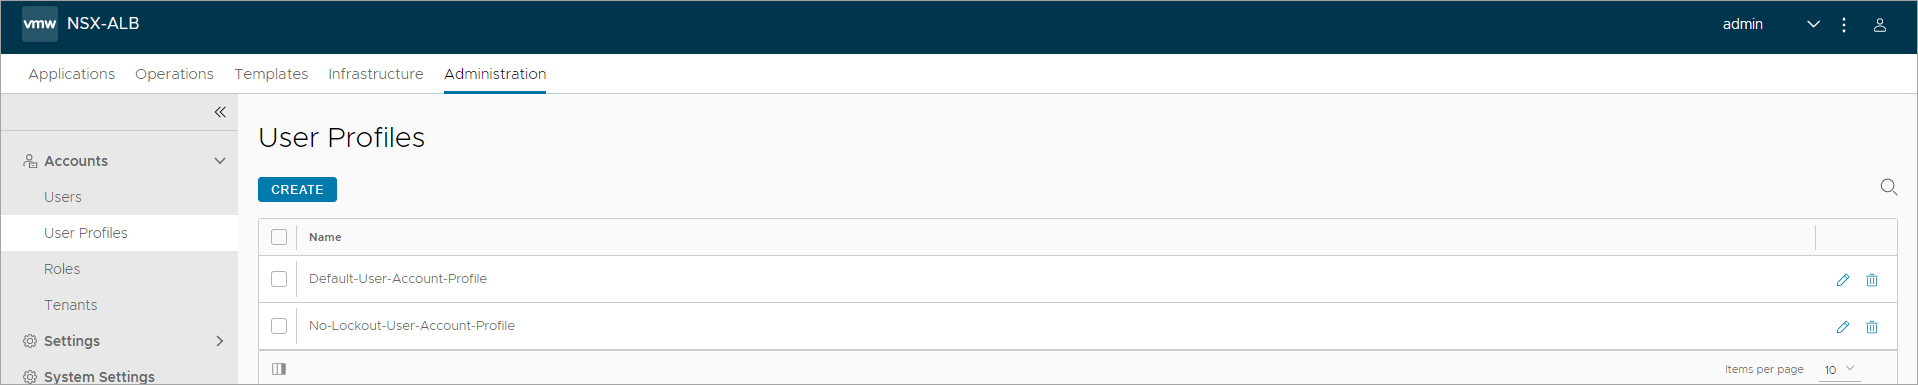
- From this screen, Create new user profiles, edit or Delete existing user profiles, as required.
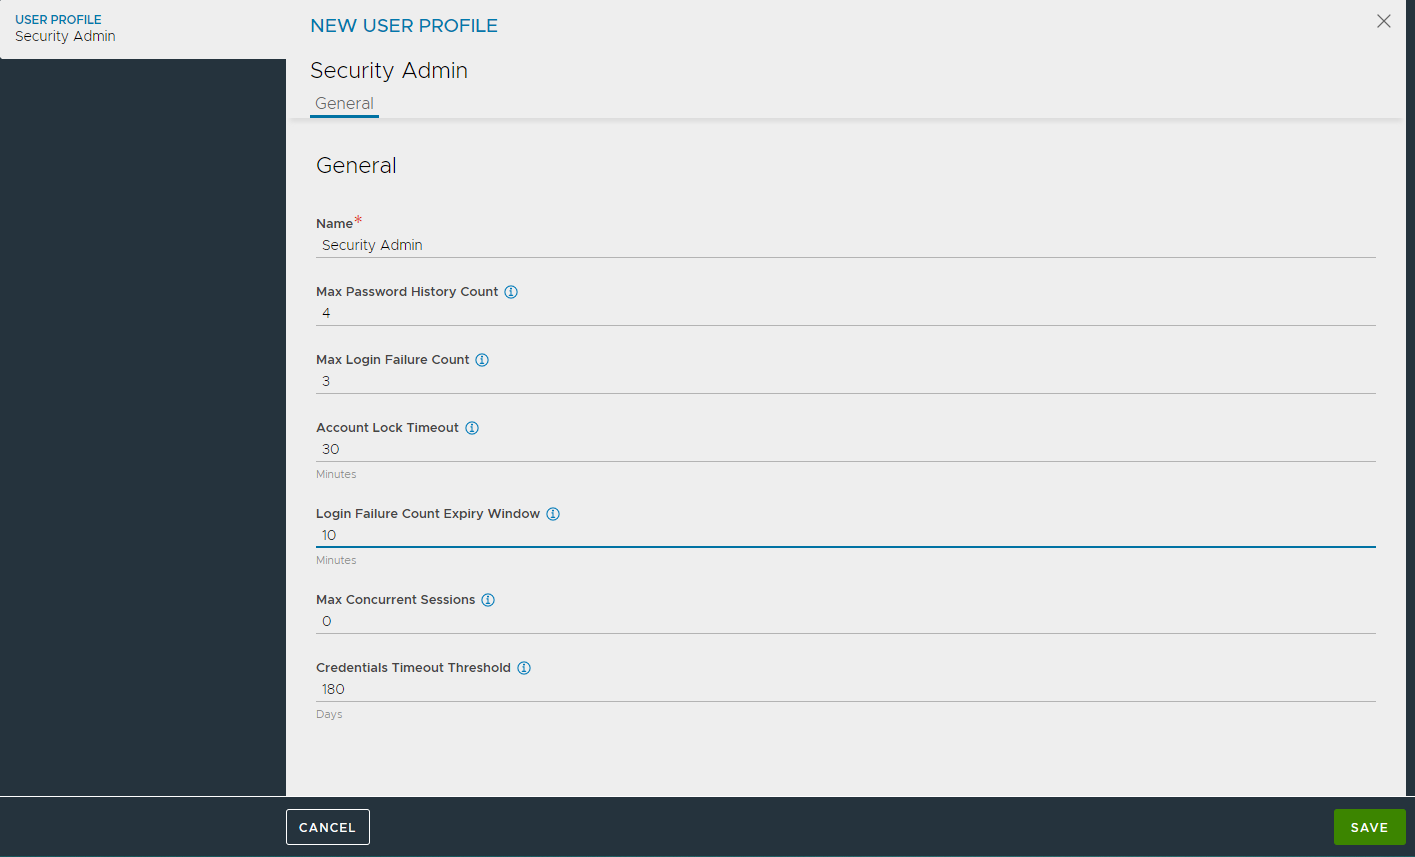
Creating a User Profile
To create a new user profile,
-
From the User Profiles screen, click Create. You can view the New User Profile screen.
-
Enter a Name.
-
Under Max Password History Count enter the maximum number of passwords to be maintained in the password history.
-
Under Max Login Failure Count, enter the maximum number of login attempts before lockout, between the range 3 to 20. Enter 0 to allow unlimited number of login attempts.
-
Enter the Account Lock Timeout period in minutes.
-
Under Login Failure Count Expiry Window, enter the time (in minutes) within which only
login_failure_attemptsfrom the past will be considered for account lockout. Set this to 0 if you do not want to do a time-based account lockout and consider all failed login attempts irrespective of time frame. -
Enter the maximum number of concurrent sessions allowed.
-
Under Credentials Timeout Threshold in days, after which the credentials are invalid.
The New User Profile screen is as shown below:
-
Click Save.
To completely avoid the risk of your account getting locked, you can use the No-Lockout-User-Account-Profile. By default, this user profile has Max login Failure Count and Login Failure Count Expiry Window set to 0.