Service Discovery Using IPAM and DNS
Overview
Avi Vantage can be configured to provide automatic IP address allocation for virtual services and to provide authoritative DNS resolution for their virtual IP addresses. Use this article to learn:
- What IPAM and/or DNS provider choices exist, on a per-cloud-type basis
- General configuration workflow
- Provider-specific IPAM/DNS profile configuration
- How to use these profiles in a virtual service configuration
Note: Starting with Avi Vantage version 20.1.3, GCP IPAM on GCP is not supported.
IPAM/DNS Support for Cloud Infrastructure
Note: The interpretation of the Infoblox columns changes with release 18.2.5. Prior to 18.2.5, choosing Infoblox as the IPAM provider forced one to choose Infoblox as the DNS provider, and conversely. Starting with 18.2.5, this restriction is relaxed. One can choose Infoblox for one function and some other provider for the other.
| Provider ------> | Infoblox | Avi Vantage Internal | Cloud-native | |||
|---|---|---|---|---|---|---|
| Cloud Infrastructure | IPAM | DNS | IPAM | DNS | IPAM | DNS |
| VMware vCenter | Yes | Yes | Yes | Yes | N/A | N/A |
| OpenStack | No | No | No | Yes | Yes (default) | N/A (not used) |
| Amazon Web Services | No | No | No | Yes | Yes (default) | Yes (default) |
| Google Cloud Platform | No | No | No | Yes | Yes | No |
| Azure (as of 18.2.5) | No | No | No | Yes | Yes (default) | Yes (default) |
| Containers (Mesos/Kubernetes/Rancher/Docker UCP) | Yes | Yes | Yes | Yes | Yes | No |
| Linux Server (bare metal) | Yes | Yes | Yes | Yes | Yes | No |
| No access cloud | Yes | Yes | Yes | Yes | Yes | No |
The following hold true for all 18.2.x releases
- When creating virtual services in OpenStack or AWS cloud, a separate configuration for IPAM is not needed/allowed, since the cloud configuration has support for IPAM natively in Avi Vantage.
- “Default” means Avi accepts the cloud’s IPAM/DNS support without additional action on the part of the Avi Vantage admin.
- Avi Vantage supports Route 53 when AWS is the cloud provider configuration in Avi.
- “Not used” means, although the cloud supports DNS, Avi Vantage does not use it.
- When creating a virtual service in “Linux Server” cloud in AWS/GCP environment, you can use the cloud-native IPAM solution of AWS/GCP.
- Avi Vantage DNS service can be used with all these clouds.
General Configuration Workflow
Initial configuration is common to both IPAM and DNS. This section lists the steps for configuring IPAM and DNS support. The configuration fields differ among the infrastructure types and the provider (Avi Vantage, Infoblox, AWS, GCP, and OpenStack). See the sections following this one for detailed steps.
- Navigate to Templates > Profiles.
- Click on IPAM/DNS Profile.
- Click on Create and select the provider.
- Fill in the displayed fields. (Detailed steps are provided in the sections below.)
- Click on Save. The profile appears in the list.
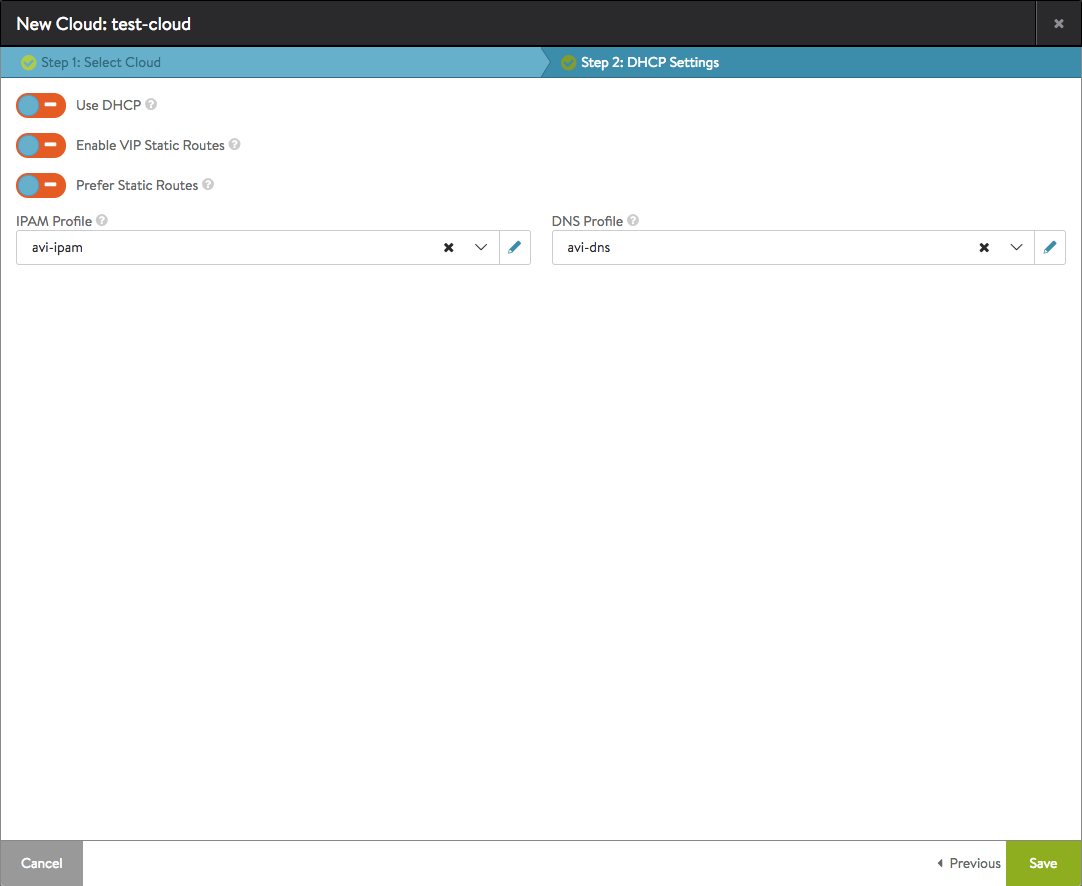
- Navigate to Infrastructure > Clouds, and edit the cloud setting.
- Select the IPAM and DNS providers from the pull-down list. Either one or both need to be selected, based on the provider selected.
For example, in releases prior to 18.2.5, if Infoblox is the IPAM provider, it must be the DNS provider as well. - (Optional) For east-west virtual services in this cloud, you need to additionally select east-west IPAM and DNS providers from the pull-down list. Either one or both can be selected.
- Click on Save.
Configuring the IPAM/DNS Profiles by Provider Type
IPAM and/or DNS profiles can be configured to use the following providers:
Using IPAM/DNS in a VS Configuration
The following examples are cloud-independent.
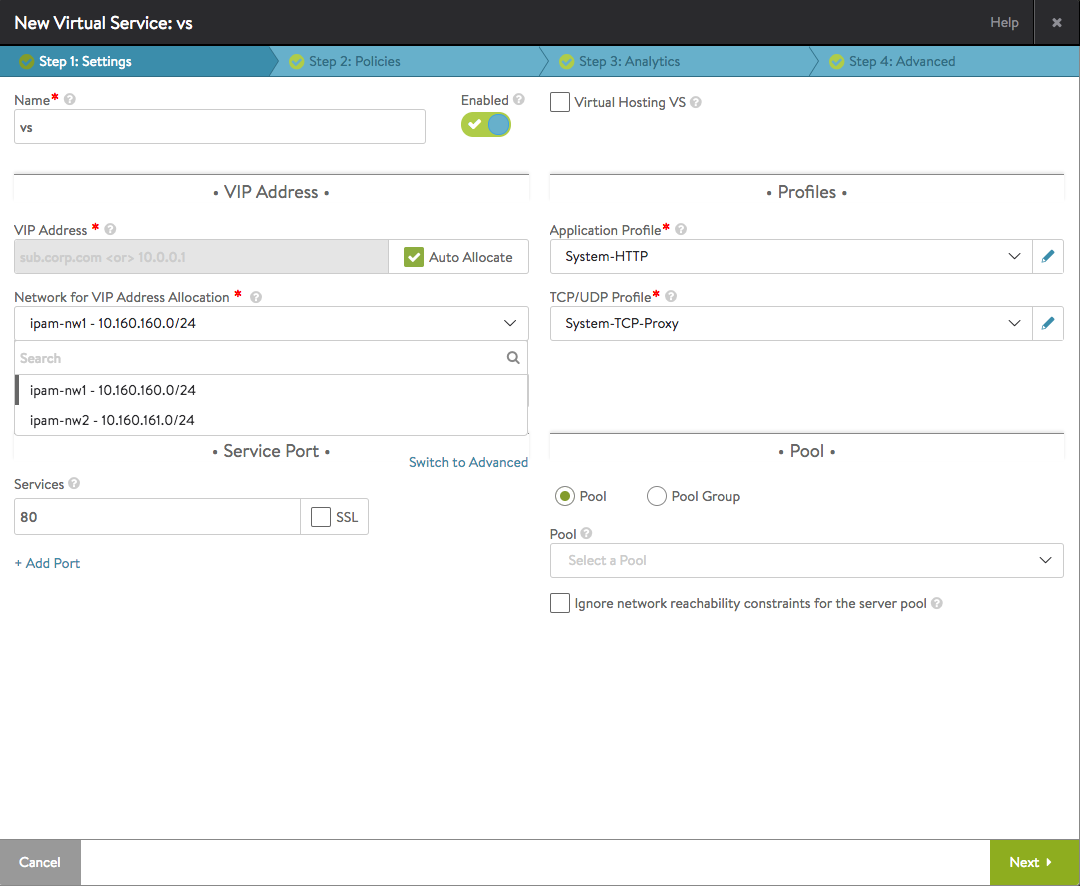
IPAM only. With IPAM in play, selecting the Auto Allocate checkbox causes the Network for VIP Address Allocation selection box to appear. From a list of displayed networks and subnets a choice can be made; in this case, either ipam-nw1 or ipam-nw2 can be selected. From the selected network (ipam-nw1) an address for the VIP will be auto-allocated.
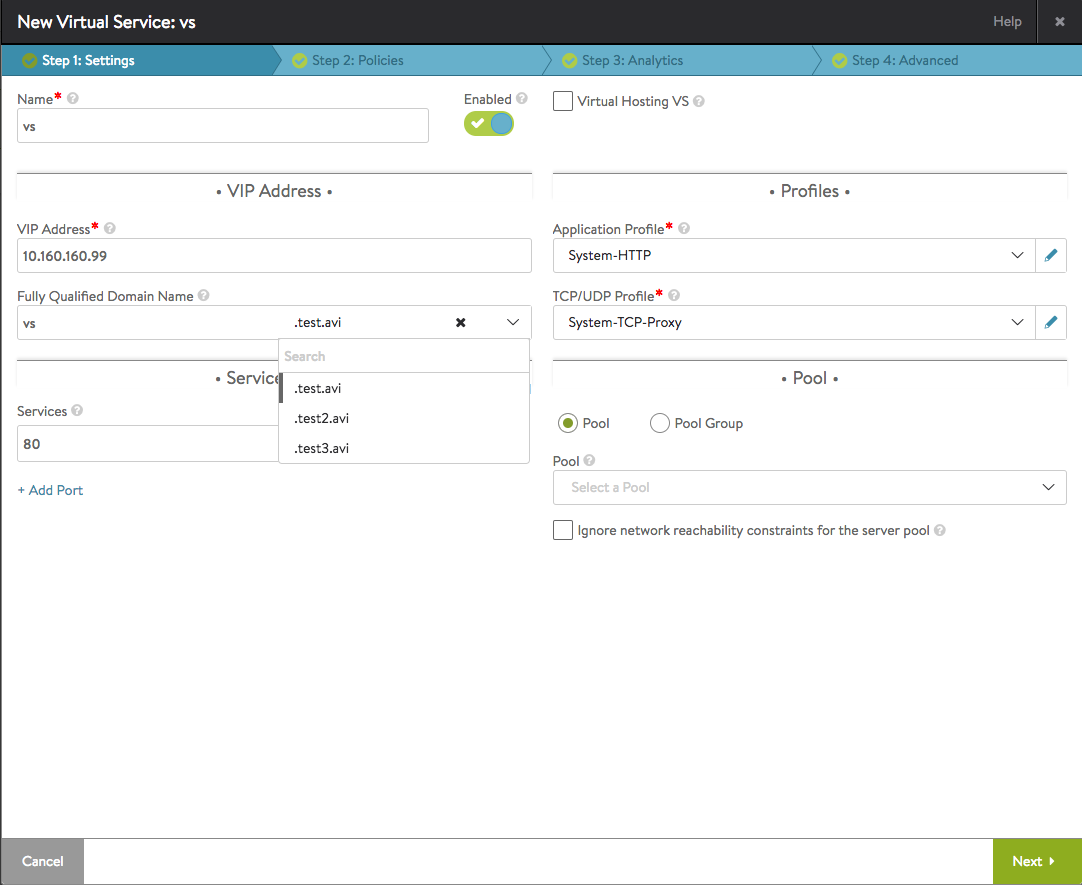
DNS only. With DNS in play, no list of networks is offered. Instead, one of several domains is offered. By selecting .test.avi from the list and accepting the default prefix (vs) in the Fully Qualified Domain Name field, the user is specifying vs.test.avi as the final FQDN.
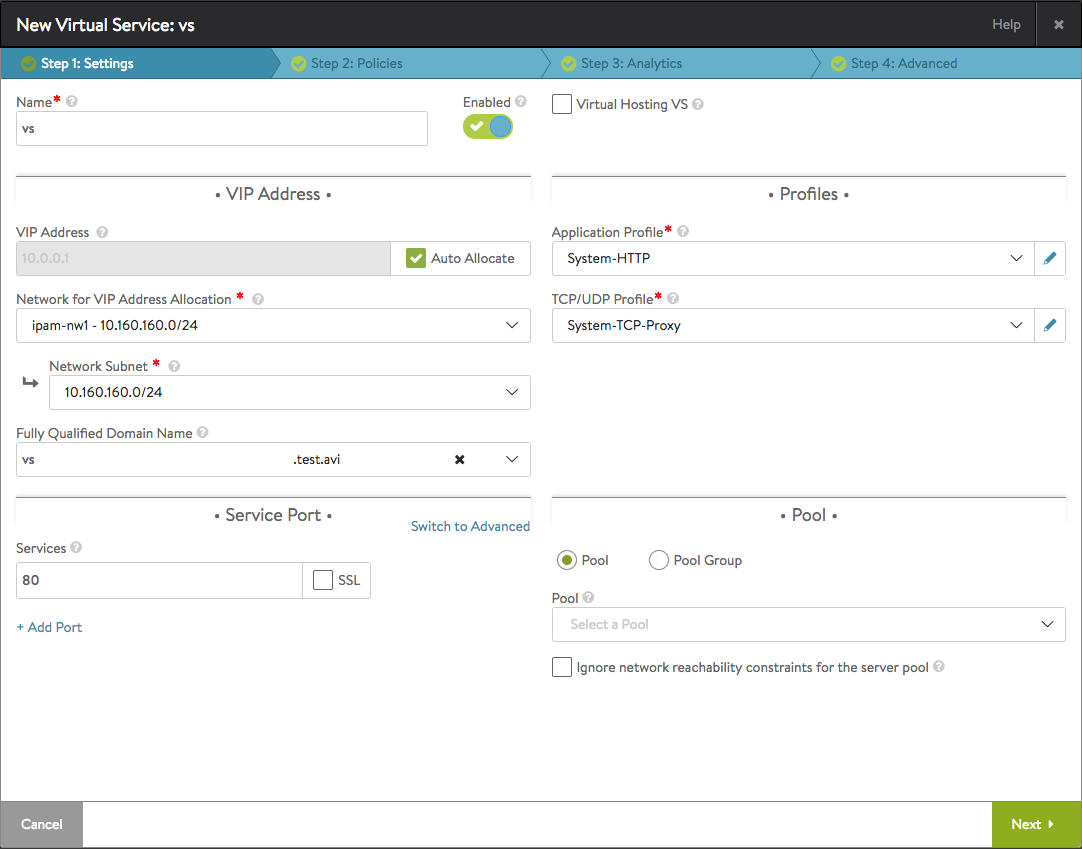
IPAM and DNS. With both IPAM and DNS available, the user can both specify a network from which to auto-allocate a VIP address and the FQDN (vs.test.avi) to which it will be associated.
Notes:
- If a DNS profile is configured under a cloud where the virtual service is being created, then the virtual service's IP cannot be determined from a fully qualified domain name; the user is expected to enter an IP address or select the Auto Allocate checkbox.
- In the case of Infoblox, if there is a list of usable_subnets/usable_domains configured (refer to section for Infoblox above in this article), then the dropdown will consist only of those entries. If no such configuration is found, Avi Vantage will display the entire list of available subnets/domains from Infoblox.
- VIP allocation through DHCP is not supported.