Deploying Avi Vantage in Write Access Mode
Overview
This guide explains the deployment process of Avi Vantage in write access mode. Write access is the recommended deployment mode. It is the quickest and easiest way to deploy and offers highest levels of automation between Avi Vantage and vCenter.
After completing the deployment process, click here for more information on creating virtual services.
Deploying Avi Vantage in Write Access Mode
Following are the steps to deploy Avi Vantage in a vCenter managed VMware cloud in write access mode:
- Performing initial Avi Controller setup
- Installing Avi Service Engine
- Downloading Avi Service Engine on OVA
- Deploying Avi Service Engine OVA file
- (For static IP assignment) Configuring IP address pools for networks
Note: It is mandatory for No Access clouds on vCenter environments, that the AVISETYPE ovf parameter contains NETWORK_ADMIN,AVICLOUD_UUID: <cloud-uuid> in a scenario where a write access cloud is also pointing to the same vCenter.
Performing the Avi Controller Initial Setup
You can change or customize the settings by following initial deployment using the Avi Controller’s web interface.
Navigate to the Avi Controller on your browser.
Note: While the system is booting up, a blank web page or a 503 status code may appear. Wait for about 5 to 10 minutes and then follow the instructions as below for the setup wizard.
-
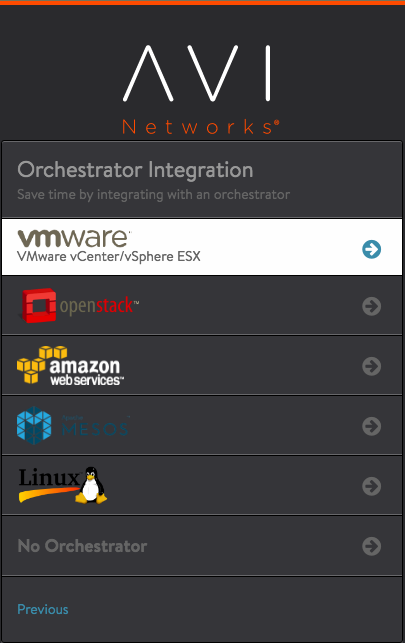
Login to the Avi Controller. Set the infrastructure type to VMware by selecting Create Cloud from Infrastructure>Cloud
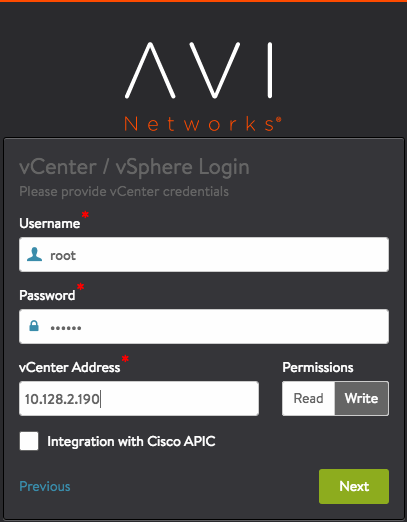
- Specify the vCenter settings.
- vCenter credentials
- vCenter IP address
- Permissions – Select Write.
- Integration with Cisco APIC – Leave unselected or disabled.
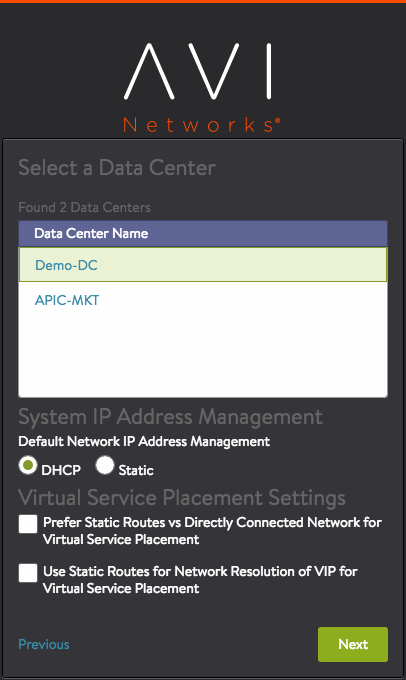
- Data center – Avi Vantage will be deployed here.
- IP allocation method for the networks where the pools and virtual services will be located – DHCP or Static. (Wizard screen below is an example for DHCP method.)
- Configure Avi Service Engine Settings.
- Management network
- IP allocation method for management network
- Support Multiple Tenants – Select No.
One vNIC out of the 10 Avi Service Engine vNIC is for management network connection. The other vNICs are data vNICs.
For IP allocation method, specify a subnet address and a range of host addresses within the subnet. For static address assignment, Avi Vantage will assign addresses from this range to the Avi Service Engine data interfaces.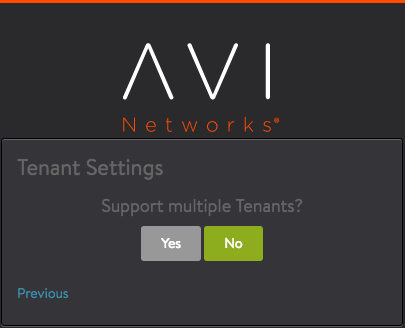
If the management and pool networks use DHCP, the deployment procedure is complete with this step. In case of static IP address allocation, you need to configure an IP address pool as explained in the next section.
Configuring IP Address Pools
Note: This section is applicable only for static IP address allocation.
Configure IP address pools for networks hosting Avi Service Engines by following the steps mentioned below:
- Navigate to Infrastructure > Cloud > Default-Cloud. Click on edit icon. Select Network tab in Default Cloud window.
- Find a port group and IP subnet on which the DHCP service is not available.
- Select the port group by clicking on the edit icon.
- Select Static under Network IP Address Management.
- Select the IP Subnet by clicking on the edit icon.
- Enter the static IP address or the range of IP addresses.
Verifying the Configuration
To verify the installation, navigate to Infrastructure > Clouds and click on Default-Clouds. Click on the Status button. If the status is green, then the installation is successful.

Communicating with Controller and VMware
The Avi Controller must be able to communicate with vCenter and all ESX hosts that contribute to the deployment. If the communication fails, then the Avi Controller will not be able to spawn Service Engines.
Similarly, if the ESX hosts have DNS names, then the Avi Controller must point to the DNS server used by the ESX hosts to avoid the names resolving to different IP addresses.